Piles. Baskets. More piles. 12x12 sleeves. Envelopes. Well, I pretty much had paper scraps in all of those places. And some of those piles and 12x12 sleeves contained scraps from when I went to the Craft Farm a year ago. *gulp* Years ago, I purchase a hanging file folder crate for all of my Stampin' Up! paper scraps. Since then, they have added colors, retired colors and well...my scraps piles have GROWN. It was time for an intervention. It is my goal to finally (I mean it!) get my craft space in super organized order. Baby steps. I got TWO new hanging file holders at Wal-Mart and went to town sorting & pitching (just gross pieces and small ones that I can't do anything with....all you paper hoarders need to exhale now...). I won't kid you. People, THIS TAKES A LOT OF TIME. But, it's SO worth it!!
Look at all of the pretty little piles that will get sorted into the hanging files.
BAM...the completed project. I know you want to DROOL. Go ahead. I'll wait. I decided to keep all of the tabs to the far right as I am right-handed and it makes for easy flipping. I just flip through, find the color I need and grab it. As SU! adds colors to their color line (new In Colors come out June 1st!) I can easily add extra folders, create the coordinating tab and expand my system. Having two of these bins allows for growth. My original crate was so crammed full that the folders didn't even move. Ugh.
I typed the names of ALL of the SU! colors and created tab inserts. I then punched a small scalloped circle of every single color (minus the ones Connie did for me since I was lacking a few...Thanks, Connie!). I then arranged my folders in ROYGBIV order (red, orange, yellow, green, blue, indigo, violet....then all the neutrals). I know you have goosebumps now. Love it!
I adjusted two shelves in my giant white cabinet so I could easily fit the plastic hanging file bins inside. I just store the lid behind the bin. See those dots? Well, that represents what color families are in this bin...(ROYG)...and the other bin will have (BIV) and neutrals. The solid pieces of 8 1/2 x 11 are to the right and all scraps in those colors are found in that bin. Get it...solid pieces to the right, coordinating scraps in the bin next to it. OH my. Got hives now? I am so stinkin' excited about this step in my organization. I am a visual person so it is easier to glance at the dots and know what colors are in this bin, instead of reading a label that says RED,etc. Ya know?
Within that same giant cabinet, I have all of my 12x12 paper, too. I use the Cropper Hopper holders. Snag those when JoAnn's has a scrapbook organization sale. From left to right, I have: 1)textured 2) textured scraps 3) SU! solid 4) non-SU! solid 5) giant paper pad from Hobby Lobby 6)patterned paper (this needs revamped as I have to flip through it all) 7) glittered papers...and the rest of the containers have specialty papers, shaped and die-cut 12x12, etc. The very last container is all of my alphabet stickers. I will show more on that in a future post. I have actually moved it from there, but this pic was taken before that. Ok, so now you can see how I have most of my paper and scraps organized. I do have some of my seasonal or special papers in a JetMax cube with hanging folders. More on that later, too.
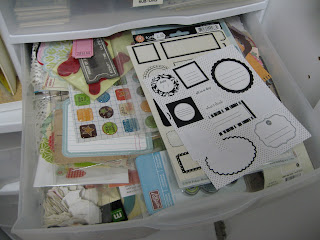
On my to-do list...making sense of my "miscellaneous embellishments" drawer. Ugh. I just dig and dig and it makes.me.insane. Thanks for stopping by...hope you're inspired to go organize something! :) I'll keep sharing my progress with you.


1 comment:
Good for you girl!!!! I may need you to get over here to help my space!!
Post a Comment