In March 2013, I started creating scrapbook pages about my great niece Ella. I plan to share most all of the ones I made. This is the first page in her album. Her mommy and daddy used their adorable pooch as a model for the announcement. You know how CNN always has "breaking news". Well, I thought that title might be a cute concept for the page where they show how they announced the news to our family. They can journal in the white area to tell the story(journaling box made with Kiwi Lane template Wacky). So...here's the first page of many that I plan to share. Thanks for stopping by! (Please note: I quickly took snapshots of the layouts and most aren't cropped, etc. I hope you can still see the detail of the photo. Click on any photo for a closer look.)
Monday, February 17, 2014
Friday, February 14, 2014
2014 Valentines
The main reason I make and send cards...to show people how much I love them. I hope I accomplish that mission with each card sent. :)
I used two different double-sided patterned papers, some puffy heart stickers, twine, an embossing folder and a few stamps. The large hearts were cut out using the Cricut.
Yep...that's where my love for people comes from...the bottom of my heart. On this day, I hope you were able to celebrate someone you love. More importantly, I hope someone showed YOU how much you are loved. Everyone is priceless and life is too short to not know that. Thanks for stopping by!
Wednesday, January 29, 2014
Rhonda's Birthday 2012
I finally did the page about my sister's birthday from 2012. I used a thick glitter cardstock from Michael's for the base. These pictures just don't show the great shimmer of the paper. It is really pretty in person. I added stickers, patterned and solid paper that I cut out using Kiwi Lane templates, ribbons, some journaling, flowers and a button.
To make my clear birthday stickers "pop" off the page, I adhered them to white cardstock and cut them out. That is a nice trick for clear stickers, especially if you are adhering them over another patterned paper and don't want them to get visually lost on the page. That's it for today. Thanks for stopping by!
Tuesday, January 28, 2014
Organized Kiwi Lane Templates
Organizing is one of my favorite things to do, especially in my craft area. Once I got my first order of Kiwi Lane templates I needed a better way to organize them. I didn't want to keep them on their rings and hang them on a rod or storage spinner in my craft area as show in this older blog post (click HERE). I didn't want to throw them all in a craft drawer or plastic bin. I wanted a solution that was space-saving, yet portable. I want to easily take my Kiwis to crops after all!!! Then, the idea HIT me. A binder! This is my solution for organizing my Kiwi Lane templates. So far, I have been THRILLED with my organization solution. I can slip this binder right in my crop bag and go. No more rings. No more bulky container. Just my binder! (oh, and I don't forget to grab their awesome idea book,too. I got mine spiral bound at Staples.)
I keep my binder on the Elfa shelf just above my work desk. I have a binder for stickers, a binder for miscellaneous (sketches, product references, etc.) and the biggest binder is for my templates. Look how LITTLE room it takes up. Yippee! (Since I took this picture, I got a 2" white binder so I had more room to "grow". The one shown on the right is a 1 1/2" ring binder.)
Here you can see the other side of my binder and tell how flat it all sits. the 9x12" plastic sleeves stick above the top edge of my binder a bit, but my border templates are still protected.
As I was browsing through Staples, I came across these 9x12 job ticket holders near the page protector aisle. I about fainted. I wanted something that was 12" tall, but that would still fit in a ring binder. SCORE! I bet if Staples reviewed their camera footage of me shopping that day...well, I bet they would see me giggle and clap my hands. I was that happy!
Simply trim the top piece of plastic from each 9x12 sleeve (the top piece with one punched hole sticks up too far and is unnecessary), insert a piece of cardstock trimmed to 9x12 into the sleeve, and punch three holes on each side. I used my Crop-a-Dile as it will easily punch through the sleeve and cardstock all at once. Now your 9x12 pockets will easily fit into a ring binder.
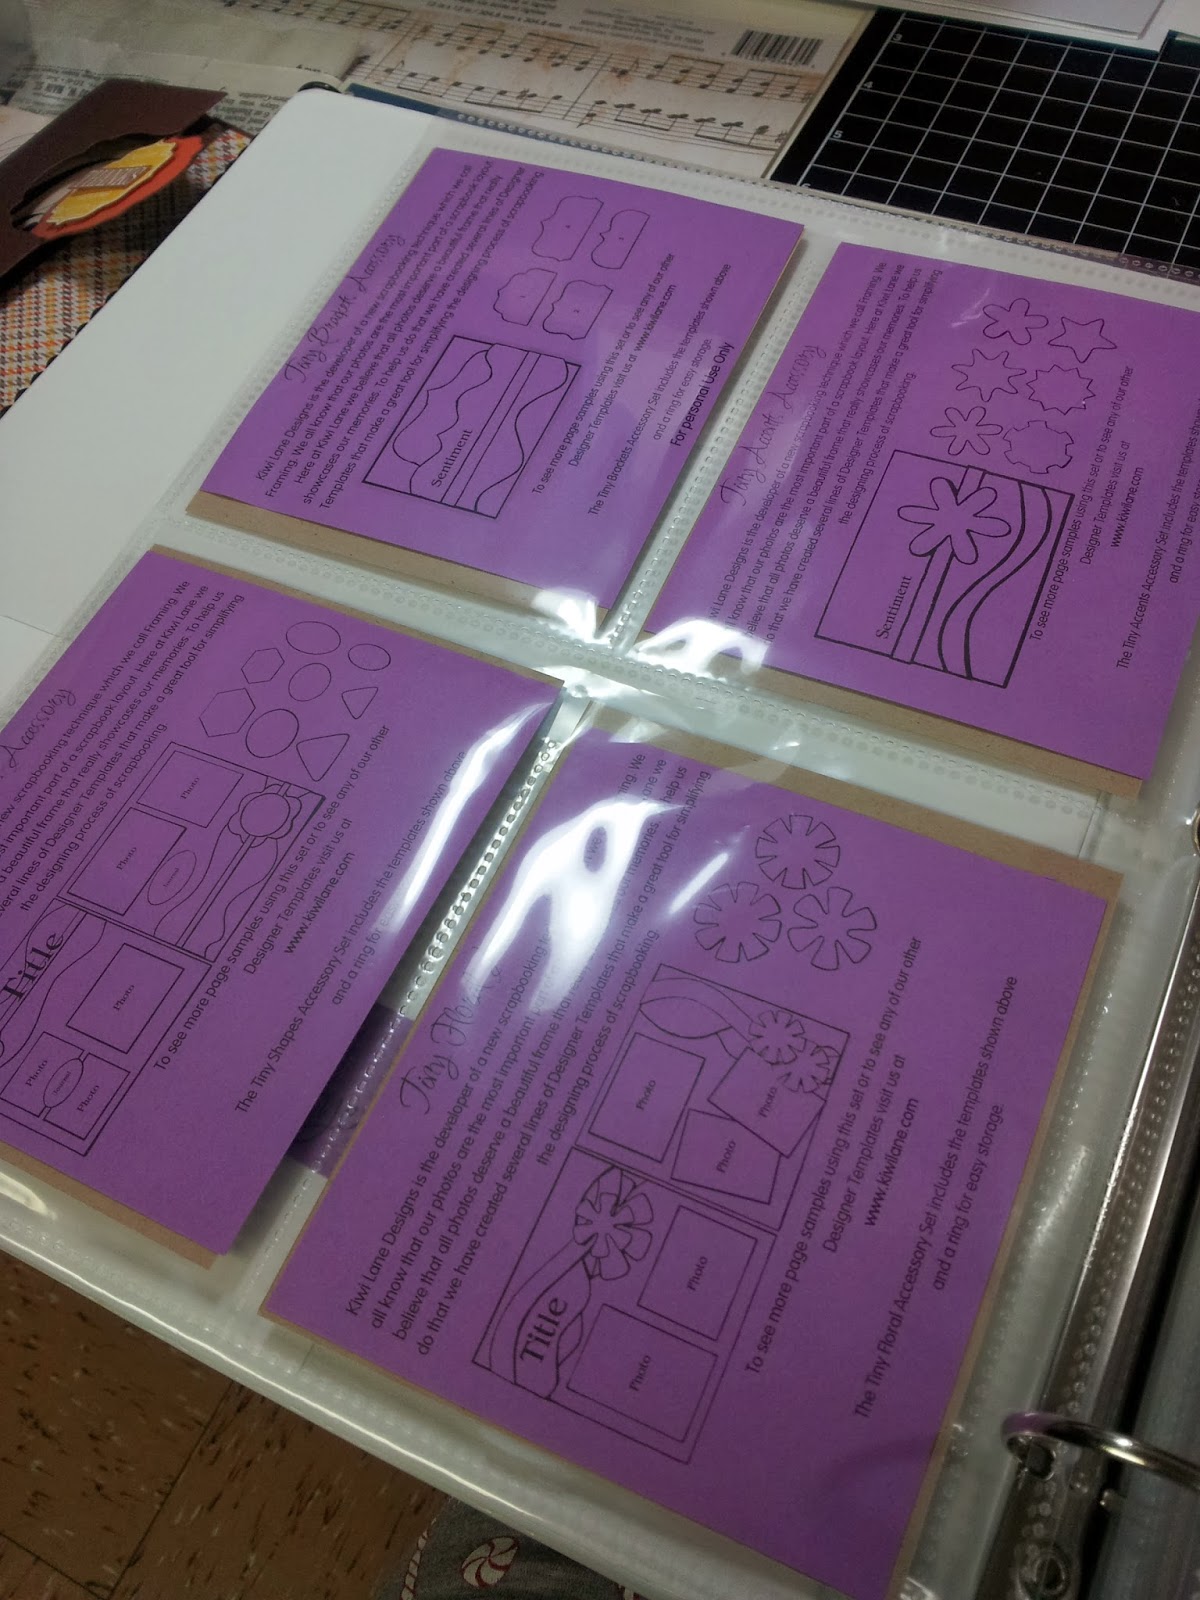
For my accessories and tiny accessories sets, I got these great multi-pocket page protectors by Martha Stewart. I love that each pocket has a top flap to keep my templates in place. I don't need to play "52 template pick up" if I drop my binder. :)
In each smaller pocket, I inserted cardstock so that the templates on the next sleeve don't show through. I also have them organized alphabetically by set name. I know....it's a sickness. I didn't adhere anything together within the pockets as I want to be able to move sets around as I buy more. That way I can have my happy little alphabetically arranged method still in place. *wink*
On the back side of the pocket, I inserted the packaging sheet from each set. Each one has the set name, shows what shapes are in that set and also has a great layout idea. I am SO glad I didn't throw these away. Even though the templates themselves are labeled, I think this is a great "at a glance" way to reference your sets.
The medium-sized accessory templates are in the two-pocket page protectors. Perfect fit!!
Again, I repeated the "save the packaging sheet" idea for the medium pocket pages.
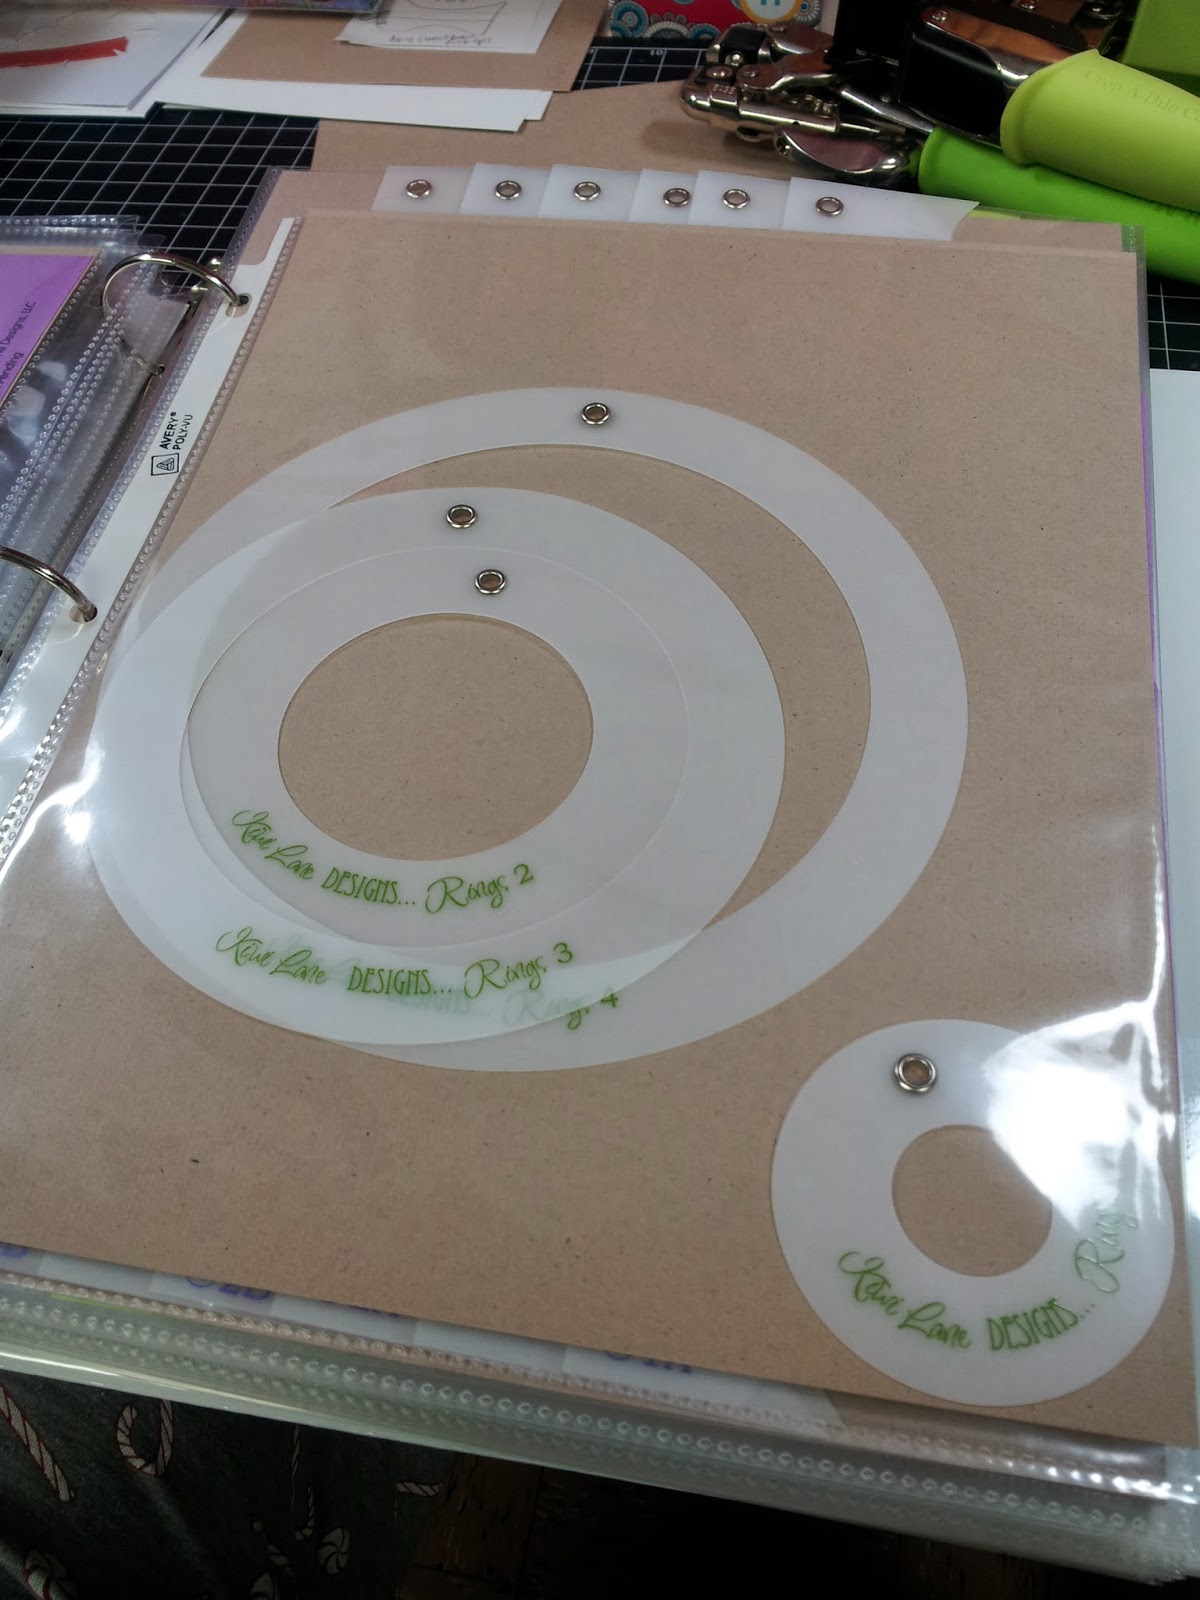
The Rings set fit best in a standard 8 1/2 x 11 page protector.
And...more packaging sheets again.
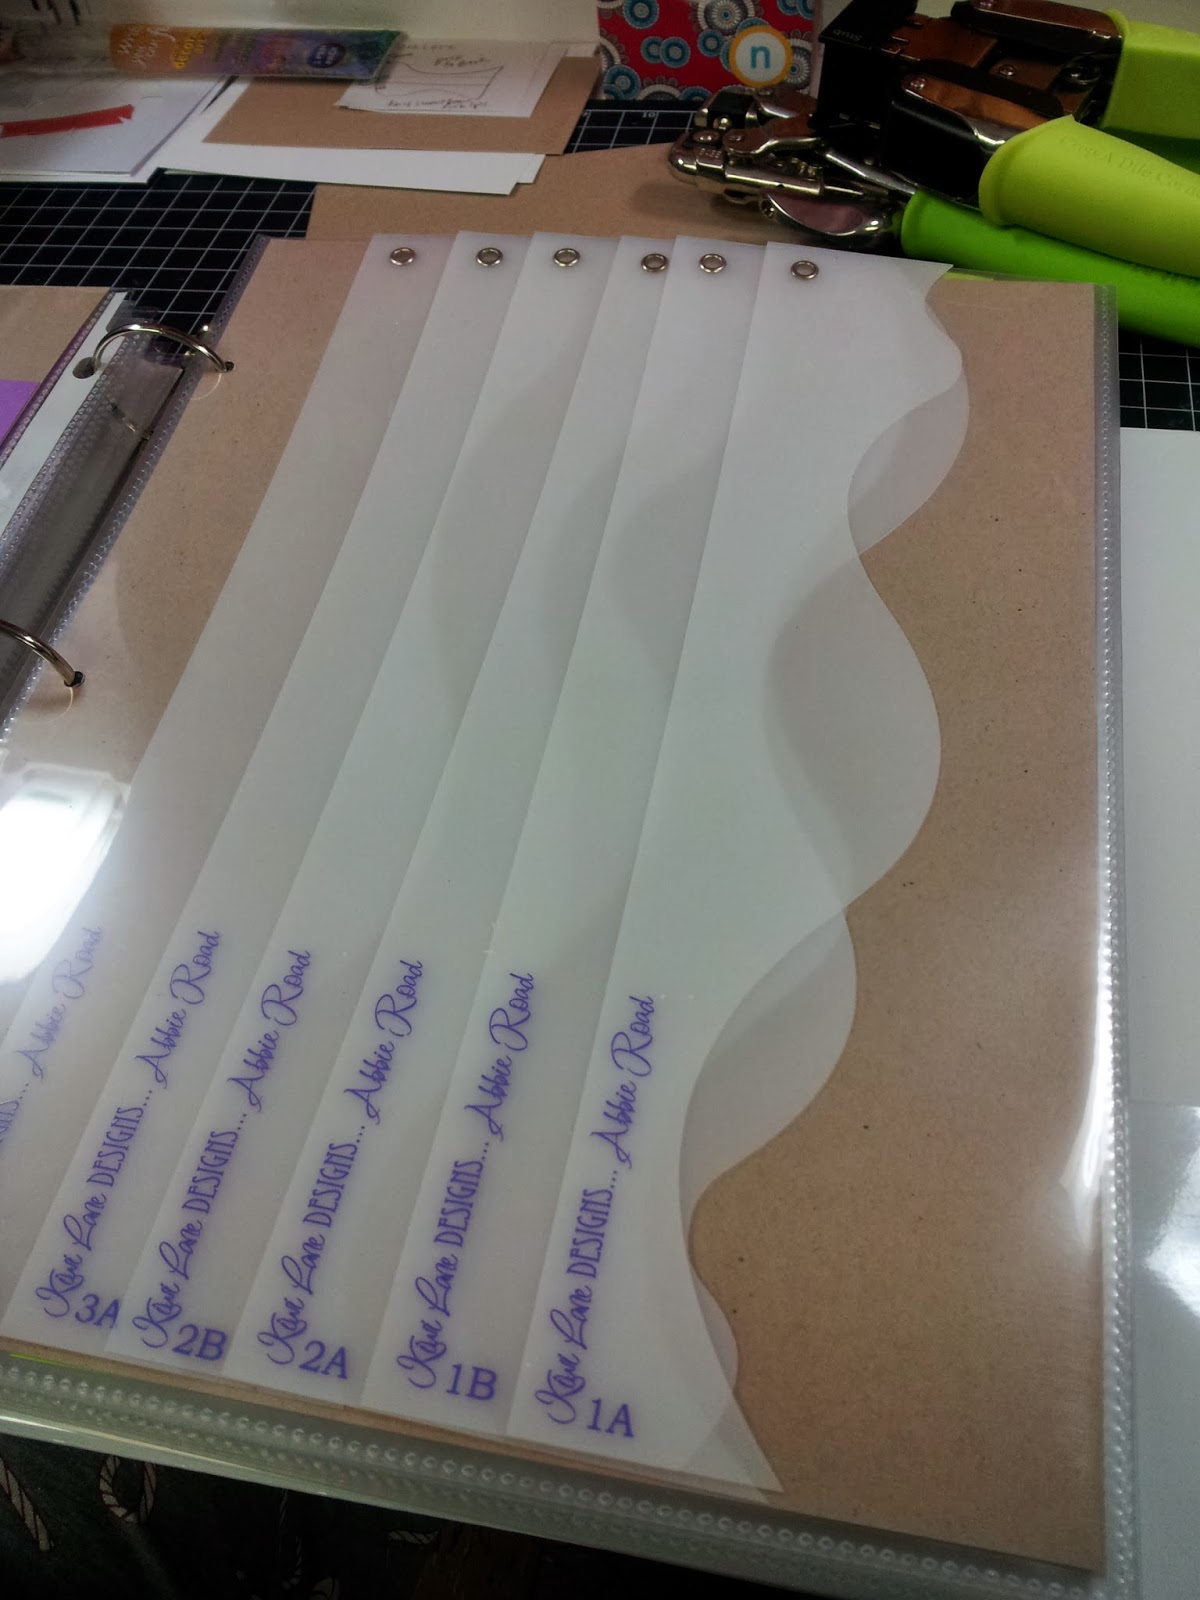
I have one border set per 9x12 pocket. Look how great they are in these...flat, not getting bent, easy to access, etc. My mouth is watering!! I love it!
And, yep...you guessed it. I kept the packaging for the border sets, too.
One last tip is to use a Corner Chomper to punch out the bottom corner of each of the 9x12 pockets. This allows them to move more easily around the mechanism of the ring binder. It isn't necessary, but does help. If you don't have a Corner Chomper, just use your scissors to snip off a bit of the corner.
And, that's it. My happy solution for organizing my Kiwi Lane templates. Hope it is helpful and thanks for stopping by! Happy Organizing!
Saturday, January 25, 2014
Kiwi Lane Templates
Thanks to my cousin, I have discovered an awesome scrapbooking tool by Kiwi Lane Designs. I just have to share with all of you!! To get the full gist of what Kiwi Lane is all about, be sure to check out their website www.kiwilane.com or watch their many videos on youtube. Their concept is called framing and it is a great way to showcase more photos per page, use a variety of patterned papers and create beautiful, unique pages. You use their templates to plan and "visualize" your layout before you even cut into your patterned paper. They have templates for scrapbooking and card-making. (I'll show you in another post how I organized my templates in a binder, too.)
Here is info about the page I made today. My subject matter is my beautiful great niece Ella that was born in August 2013. For the past year, I haven't even blogged once on here. I will catch up the events of 2013 in another post. For now, here is what I created today. First, my inspiration...
This page is where my idea started. This is a page by Susan Budge that is shown on page 44 of their idea book. I loved the colors, the "splashes" and using three photos as the focus.
I began the design process by choosing several of their templates to visualize my layout. I knew the photos and patterned paper I wanted to use and just kept building ideas from there. Sometimes when I create a layout. I stick to my original idea. During other times, I think of several little details I want to add or change. For me, scrapbooking is all about the creative design process and not necessarily about getting things done quickly. Today's layout pretty much stayed the same as I first visualized, but I added a few goodies along the way. Please note: With the templates, you can make your page as simple (and quick) as you want, or really layer things to create a more detailed look (I am all for details!).
Here is the finished layout! I will post a list of the templates I used at the end of this post. (Click on photos for a closer look.)
I created the little flags using a Hero Arts stamp set, Versamark ink and clear embossing powder. I then punched them out with my Stampin' Up! pennant punch and added some tiny brads and baker's twine. The flags remind me of the kind they hang over a pool at a swim competition.
I added Stickles glitter to the "waves" paper and placed a few bling stones around the page. Those mimicked water droplets to me since they are iridescent. I added a title using Thickers. I love the dimension of those things! Then, I made a "pool rope with buoys" using baker's twine and an oval punch. I inked all of my paper edges with a sponge dauber. That really finishes off those edges and gives dimension to the paper layers.
Ok, so there it is...my first Kiwi-inspired blog post. I created many more pages in 2013 (some using templates, some not) and I have much more to share with you. Hopefully, posting on here today will inspire me to blog again. Thanks for stopping by!
Templates Used:
- Spook Alley 2A, 2B
- Tiny Shapes 3T
- Accents 5
- Tiny Accents 5T
- Wacky 1
- Tiny Wacky 1T
- Celebrate 8
- Tiny Nature 3T
Subscribe to:
Posts (Atom)


